From Hollywood celebrities to major names in music, Annie Leibovitz is a portrait photographer with a long list of enviable subjects.
Introduce kids to her celebrated work with this creative, kinda crafty mixed media portrait photography project.
Like all the projects on Lessons From Dreamland, it’s easy enough for lower elementary, but still cute enough that you’ll actually want to hang it on your wall!
Who is Annie Leibovitz?
Annie Leibovitz is one of the most influential portrait photographers in contemporary art. Her ability to capture the essence of her subjects has made her a household name, known for her distinctive style and profound impact on the world of photography.
In 1983, Annie started working for Vanity Fair magazine. Here, she took striking, unique photos of celebrities, politicians, and other famous people.
Annie has won many awards for her work. The Library of Congress called her a Living Legend in 2000, and in 2009, the French government honored her too. Her photos have been shown in galleries and museums all over the world, making her one of the most important photographers ever.
Alice in Wonderland Series
Like a lot of contemporary artists, it can be tricky to select age-appropriate art samples for elementary students.
In the case of Leibovitz, her most famous work (like the John Lennon/Yoko Ono photo, or the Demi Moore portraits) are best avoided for young children.
But I love showing kids her Alice in Wonderland series! It’s a fabulous way to help them connect to the concept of symbolism and much of the imagery will be recognizable for them.
Key Vocabulary Terms
contemporary: Relating to the present time; modern or current.
galleries (art): Spaces or institutions where art is displayed and often sold.
portrait: Artistic representation of a person, typically focusing on the face.
subjects: Topics or themes explored in art or discussion.
symbolism: Use of symbols to represent ideas or concepts in art and literature.
Annie Leibovitz Inspired Photography Project
All you need for this project is some pretty basic craft supplies.
Materials
-camera (any kind)
-printer
-small, flat box with the lid removed
-acrylic paint
–scrap fabric
-craft glue
–cardstock
-scissors
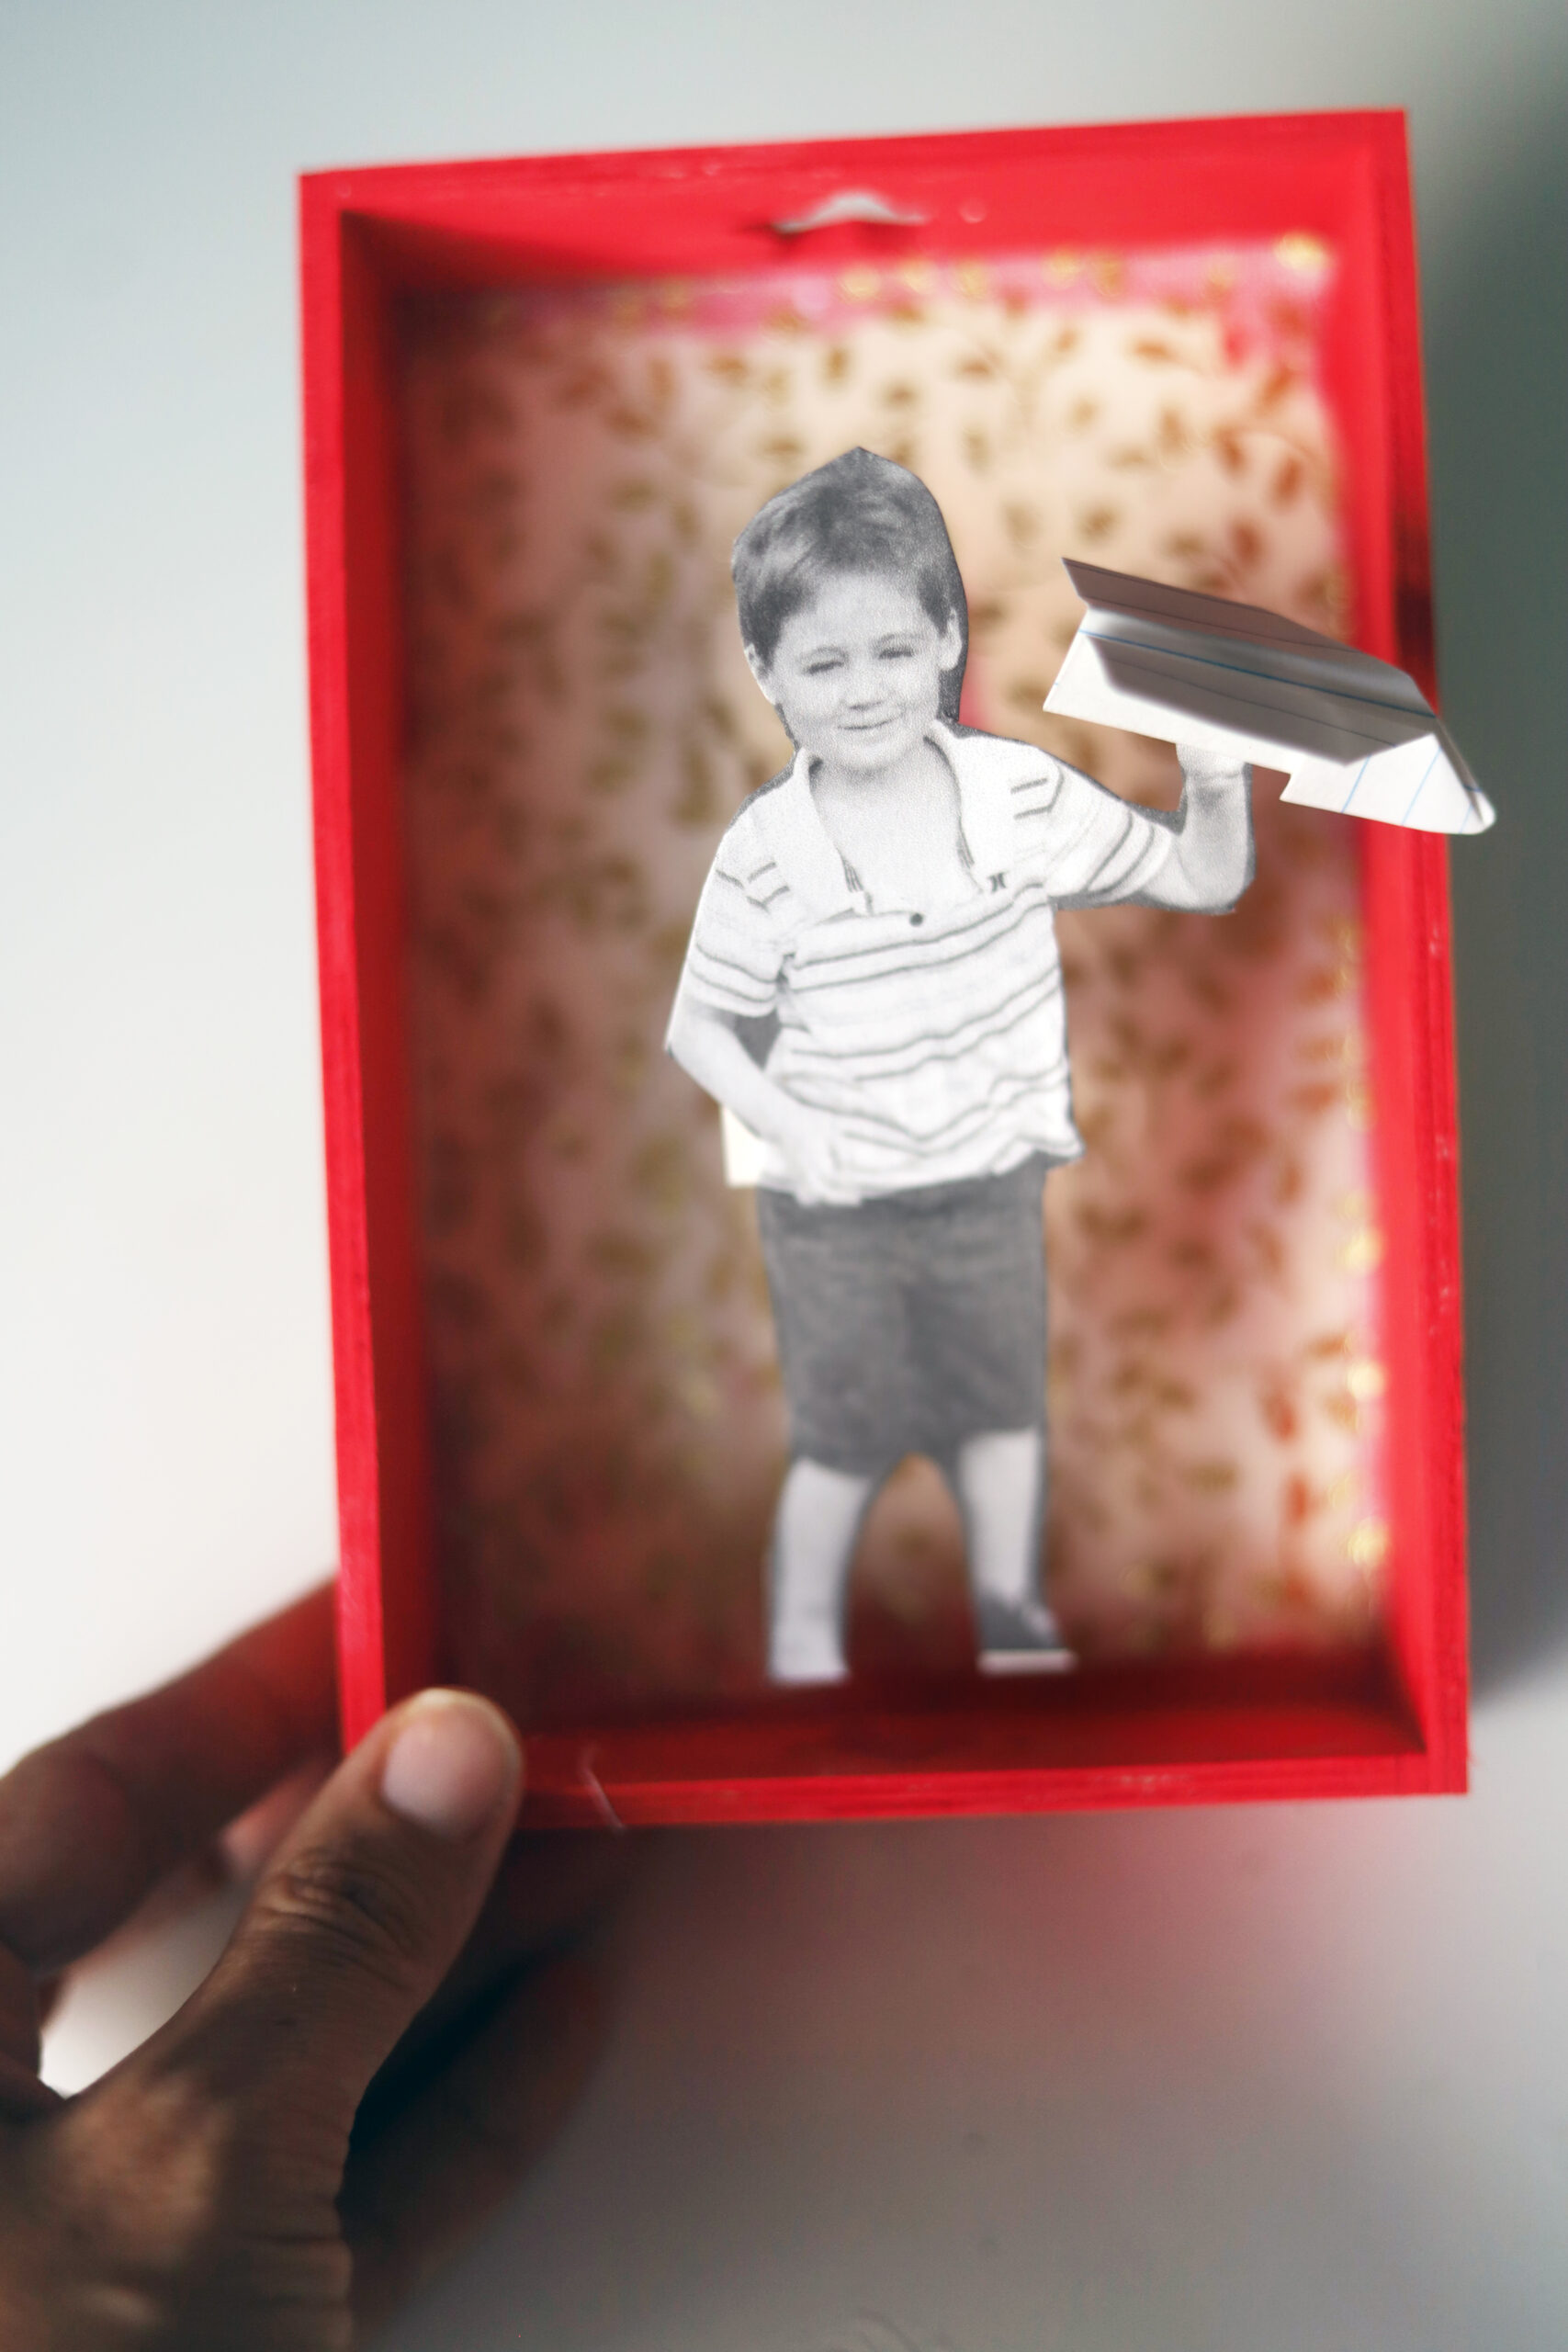
Step 1
Encourage the kids to take photos of each other. Explain the meaning of the word portrait and invite them to take photos from the chest up, emphasizing the face and eyes.
Step 2
Print out the pictures. Optionally, you can convert the photos to black-and-white first using photo editing software of your choice. The grayscale will make the photo stand out from the colorful background of the box. Glue the photos to cardstock and leave to dry.
Step 3
Choose a fabric for each box. This is a scrappy project, and a great way to use up small fabric pieces! Offer them an array of choices.
Step 4

Paint the boxes. Invite the kids to choose colors that complement the colors in the fabric they chose.
Step 5
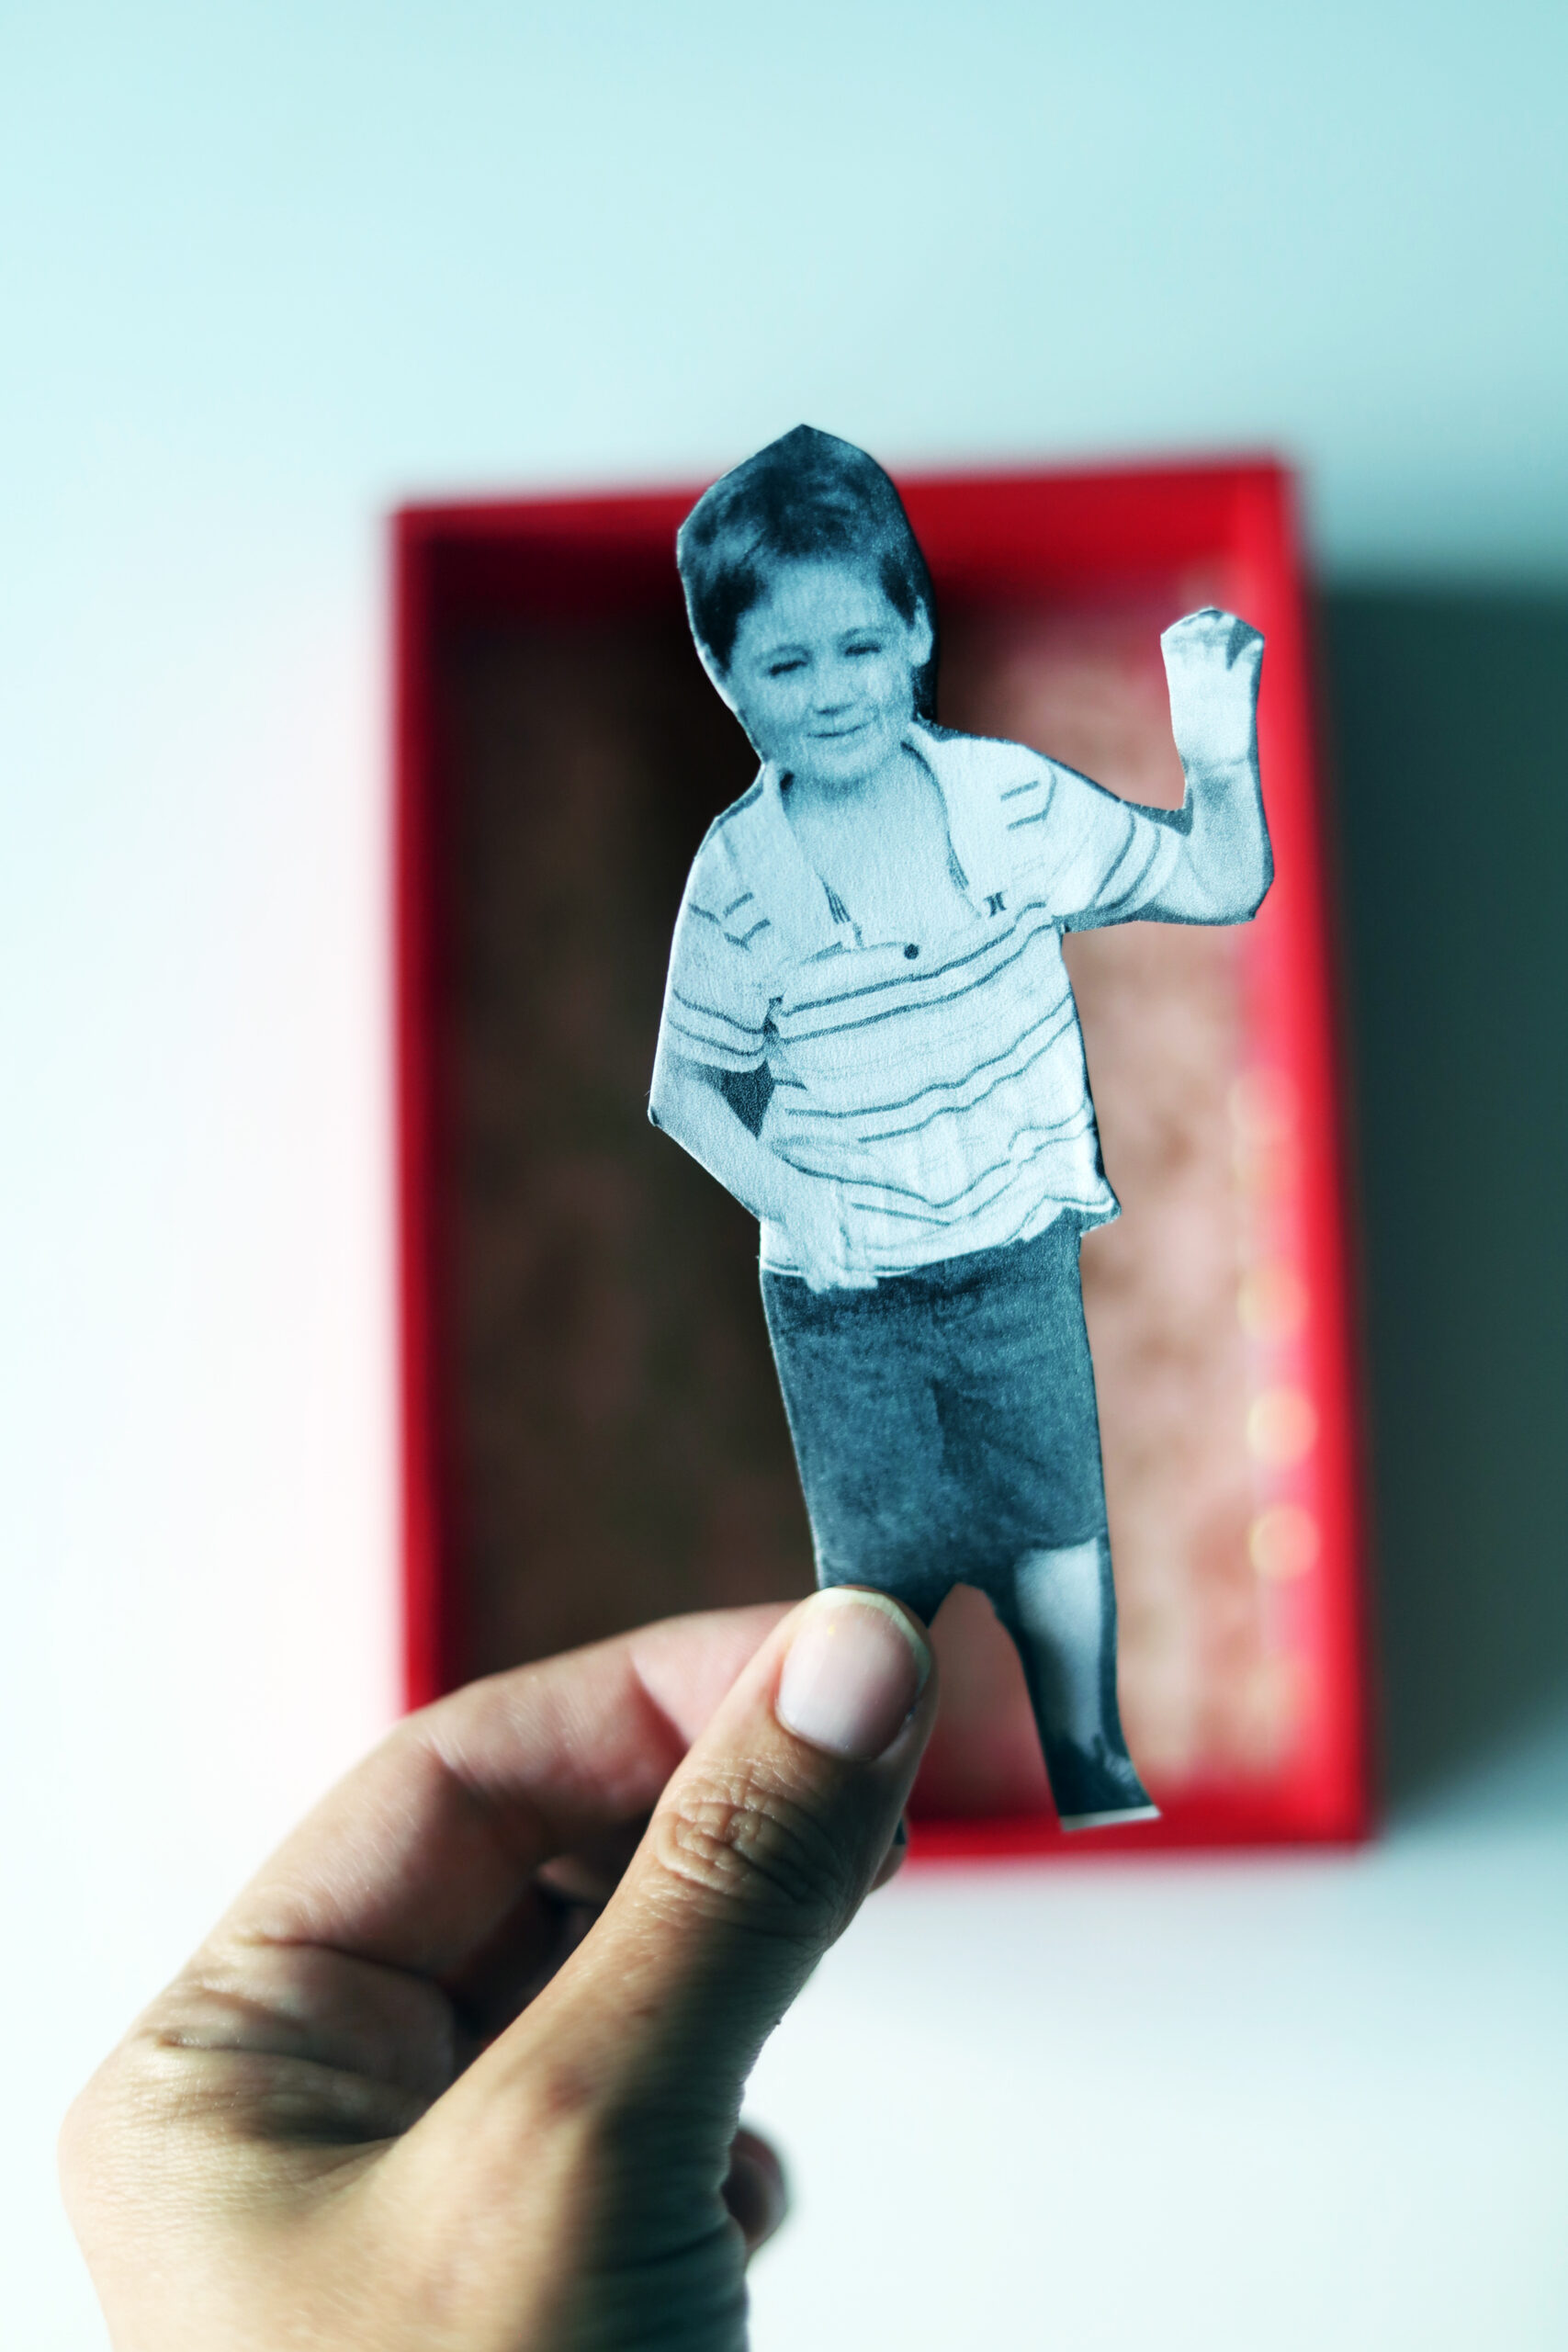
Glue photos to cardstock. A very thin layer of glue is best to avoid bubbling.
Allow the painted boxes and the photos to dry overnight.
Step 6

Trace the boxes over the fabric and cut out the pieces. You will need to trim them back slightly further that the outline in order for them to fit neatly into the box.
Mix one part glue with one part water. Soak the fabric pieces completely, then smooth them in the back of the box.
Step 7

Bend a small piece of cardstock at a right angle to create a “mount” like so and glue it into the box. Then glue the photo to the other side. You can add small touches (like the paper airplane in this child’s hand) after you’re done.